
Latest update see here https://astr0baby.wordpress.com/2018/08/03/installing-mojave-10-14-beta-in-virtualbox-5-2-16-on-linux-x86_64/
Update see here https://astr0baby.wordpress.com/2018/07/15/installing-high-sierra-10-13-6-in-virtualbox-5-2-12-on-linux-x86_64/
A short post here that might help somebody struggling to install the latest MacOS in VirtualBox on Linux. Im running VirtualBox 5.2.10 on X86_64 Linux. The process below can be replicated on Windows as well, but the networking part at the end will of course be different.
So lets first get the MacOS 10.13.4 iso (You can get the DMG and convert it to ISO, but I have little disk space now and just used a ready available ISO from the below link)
https://bit.ly/DownloadMacOSHS10134
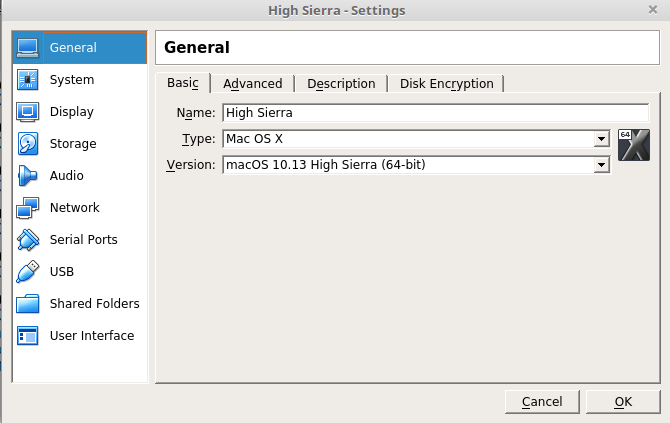
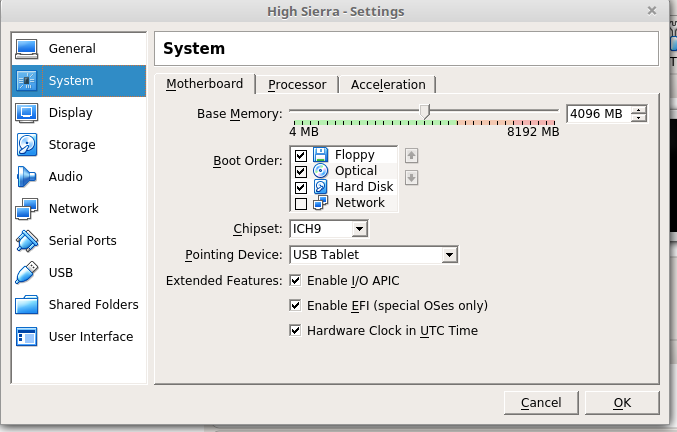
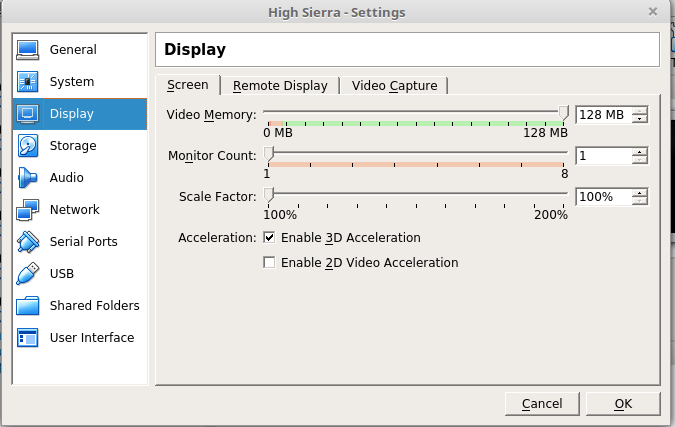
Extract the rar and setup the new VM as follows in VirtualBox

 Networking and other options are pretty straight forward, attach the extracted ISO as your boot media, and before we boot make sure to set these in the terminal
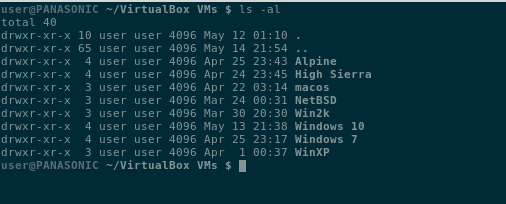
I have used “High Sierra” directory name here since this is what I have it called, your can be different (Depends on how you named the VM during creation in VirtualBox)
$ VBoxManage modifyvm "High Sierra" --cpuidset 00000001 000106e5 00100800 0098e3fd bfebfbff
$ VBoxManage setextradata "High Sierra" "VBoxInternal/Devices/efi/0/Config/DmiSystemProduct" "iMac11,3"
$ VBoxManage setextradata "High Sierra" "VBoxInternal/Devices/efi/0/Config/DmiSystemVersion" "1.0"
$ VBoxManage setextradata "High Sierra" "VBoxInternal/Devices/efi/0/Config/DmiBoardProduct" "Iloveapple"
$ VBoxManage setextradata "High Sierra" "VBoxInternal/Devices/smc/0/Config/DeviceKey" "ourhardworkbythesewordsguardedpleasedontsteal(c)AppleComputerInc"
$ VBoxManage setextradata "High Sierra" "VBoxInternal/Devices/smc/0/Config/GetKeyFromRealSMC" 1
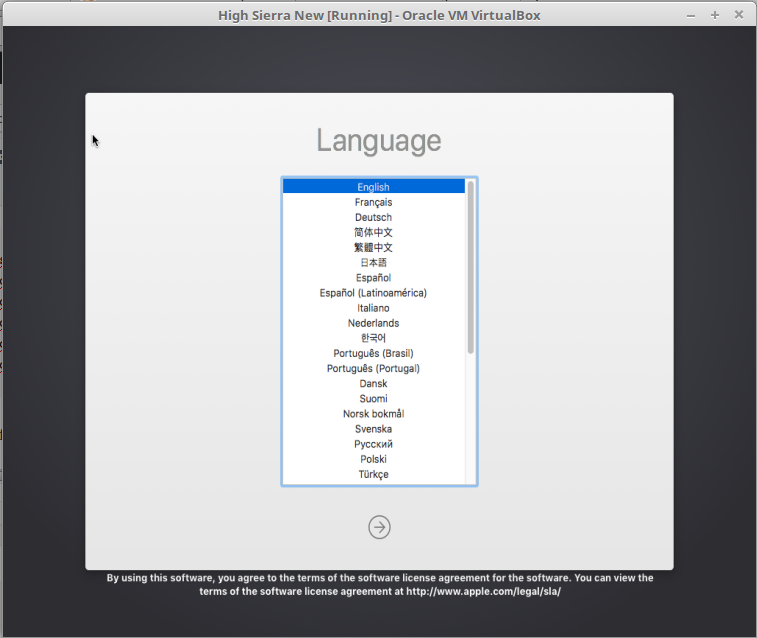
Now boot the VM and the MacOS installer will come up after some time.
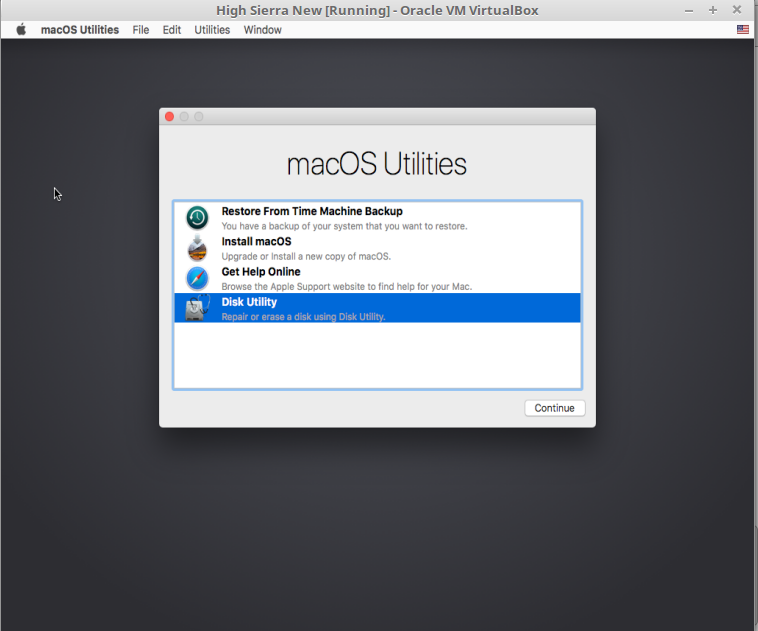
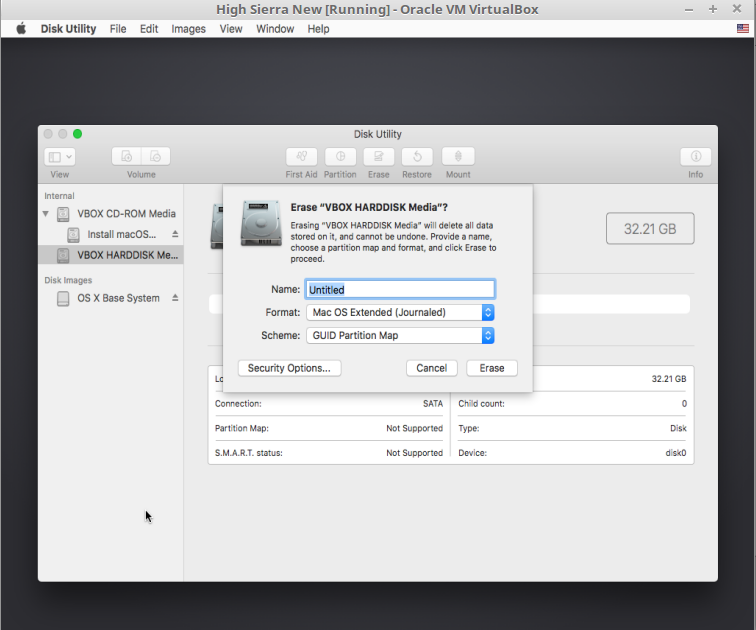
 Setup the Disk first before installing (Erasing works the best if you don’t care about the defaults) via the Disk Utility
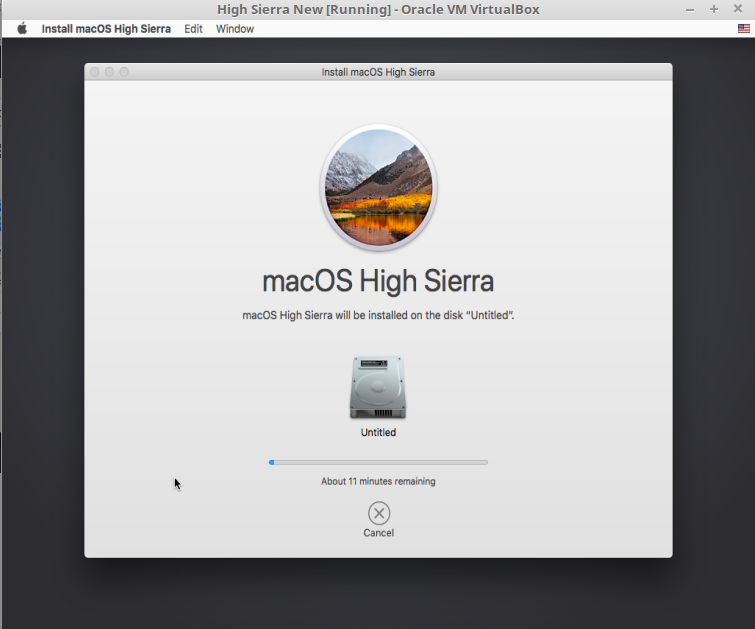
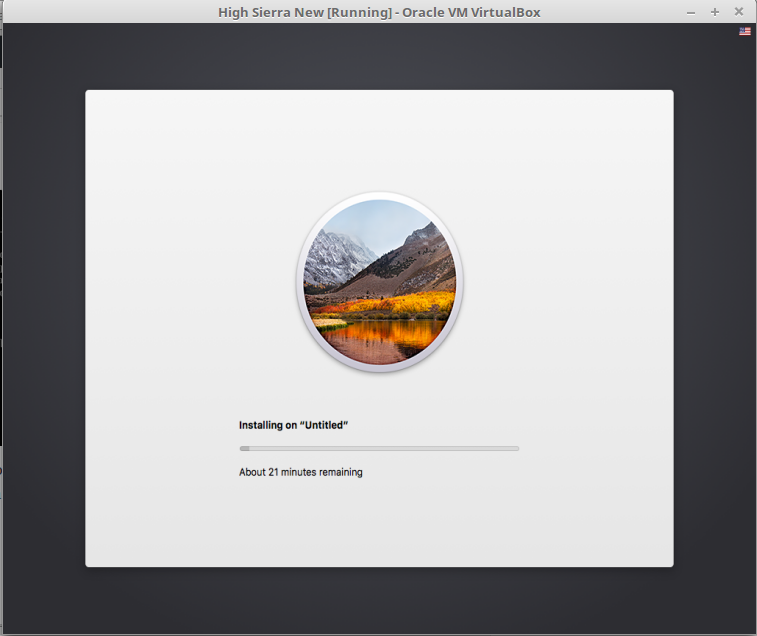
 Exit the Disk Utility and Install MacOS, this takes approx 10 minutes and then suddenly reboots (for me this happens when its 2 minutes remaining)
 Now if you don’t do anything the VM will reboot back to the installer, which we do not want. If that happens, simply power off the VM and remove the installation ISO. Now when you boot the VM again you get dropped to an EFI shell. You need to input the following commands to get this going further.
Shell> fs1:
FS1:\> cd "macOS Install Data"
FS1:\macOS Install Data\> cd "Locked Files"
FS1:\macOS Install Data\Locked Files\> cd "Boot Files"
FS1:\macOS Install Data\Locked Files\Boot Files\> boot.efi
 Now this will boot and continue with the installation and this time the setup will finish properly, but will take considerably more time than previous run.
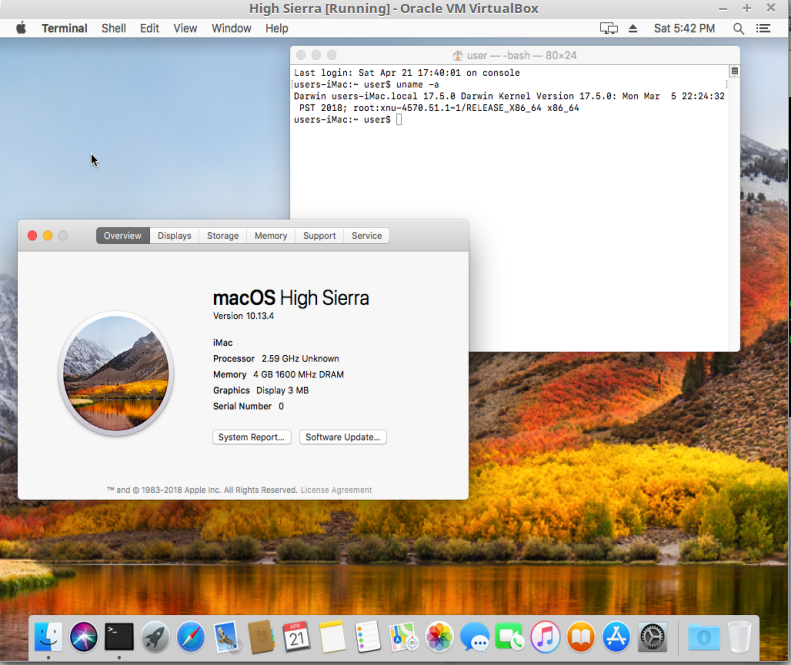
 And after some time you should have the new MacOS 10.13.4 High Sierra ready in you VirtualBox.
For Networking I choose the following script to help me interact with the VirtualBox VM and other VMs
#Setup tap and bridge
tunctl -t tap0 -u user
ifconfig tap0 up
brctl addbr br0
brctl addif br0 eth0 vboxnet0
brctl setfd br0 0
ifconfig eth0 10.0.2.1 up
ifconfig br0 10.0.2.2 netmask 255.255.255.0 broadcast 10.0.2.255 up
brctl addif br0 tap0 vboxnet0
ifconfig tap0 0.0.0.0
sysctl net.ipv4.ip_forward=1
iptables -A FORWARD --in-interface eth0 -j ACCEPT
iptables --table nat -A POSTROUTING --out-interface wlan0 -j MASQUERADE
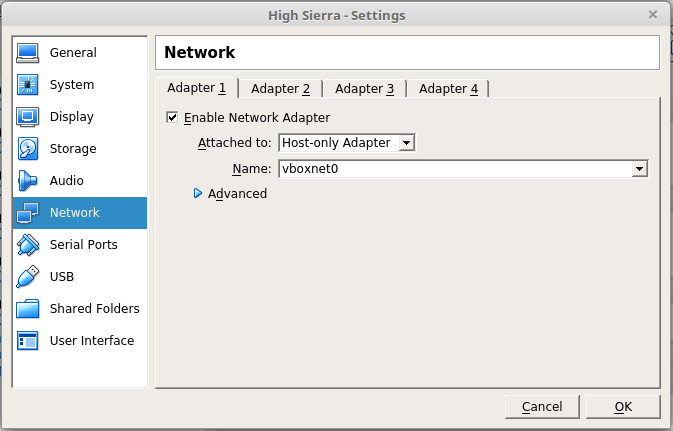
And the networking on the VM is set as follows
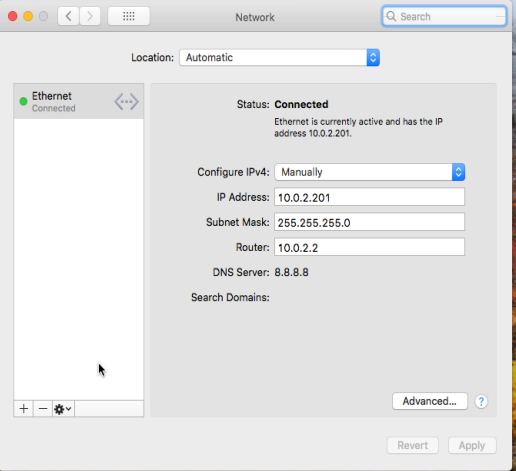
 And the Network configuration inside the MacOS VM is static as following:

Worked perfectly, thanks. On Windows 10 host using VirtualBox 5.2.8, I could get FHD 1920×1080 using:
C:\Windows\System32>”c:\Program Files\Oracle\VirtualBox\VBoxManage.exe” setextradata MacOSX-HighSierra VBoxInternal2/EfiGraphicsResolution 1920×1080
C:\Windows\System32>”c:\Program Files\Oracle\VirtualBox\VBoxManage.exe” setextradata MacOSX-HighSierra VBoxInternal2/EfiHorizontalResolution 1920
C:\Windows\System32>”c:\Program Files\Oracle\VirtualBox\VBoxManage.exe” setextradata MacOSX-HighSierra VBoxInternal2/EfiVerticalResolution 1080
C:\Windows\System32>”c:\Program Files\Oracle\VirtualBox\VBoxManage.exe” modifyvm MacOSX-HighSierra –vram 256
C:\Windows\System32>”c:\Program Files\Oracle\VirtualBox\VBoxManage.exe” getextradata MacOSX-HighSierra enumerate
Key: GUI/LastCloseAction, Value: PowerOff
Key: GUI/LastNormalWindowPosition, Value: 0,132,640,480,max
Key: GUI/ScaleFactor, Value: 2
Key: VBoxInternal/Devices/efi/0/Config/DmiBoardProduct, Value: Iloveapple
Key: VBoxInternal/Devices/efi/0/Config/DmiSystemProduct, Value: iMac11,3
Key: VBoxInternal/Devices/efi/0/Config/DmiSystemVersion, Value: 1.0
Key: VBoxInternal/Devices/smc/0/Config/DeviceKey, Value: ourhardworkbythesewordsguardedpleasedontsteal(c)AppleComputerInc
Key: VBoxInternal/Devices/smc/0/Config/GetKeyFromRealSMC, Value: 1
Key: VBoxInternal2/EfiGraphicsResolution, Value: 1920×1080
Key: VBoxInternal2/EfiHorizontalResolution, Value: 1920
Key: VBoxInternal2/EfiVerticalResolution, Value: 1080
Thanks for the FHD tip
This doesn’t work for me. My version of VirtualBox is Version 5.2.12. Any ideas?
Are you running this on Linux or Windows ?
I have just verified the Installation procedure on brand new Linux Mint 18.3 with VirtualBox 5.2.12 and it works. (Not the Full HD stuff … I don’t need that)
any idea how to get the fhd working on linux? no matter what i do i dont see the key that shows the resolution when i run the last command :(
Try this
(Replace “High Sierra” with the name of your MacOS VirtualBox instance directory)
$ VBoxManage modifyvm “High Sierra” –cpuidset 00000001 000106e5 00100800 0098e3fd bfebfbff
$ VBoxManage setextradata “High Sierra” “VBoxInternal/Devices/efi/0/Config/DmiSystemProduct” “iMac11,3”
$ VBoxManage setextradata “High Sierra” “VBoxInternal/Devices/efi/0/Config/DmiSystemVersion” “1.0”
$ VBoxManage setextradata “High Sierra” “VBoxInternal/Devices/efi/0/Config/DmiBoardProduct” “Iloveapple”
$ VBoxManage setextradata “High Sierra” “VBoxInternal/Devices/smc/0/Config/DeviceKey” “ourhardworkbythesewordsguardedpleasedontsteal(c)AppleComputerInc”
$ VBoxManage setextradata “High Sierra” “VBoxInternal/Devices/smc/0/Config/GetKeyFromRealSMC” 1
$ VBoxManage setextradata “High Sierra” “VBoxInternal2/EfiGraphicsResolution” “1920×1080”
$ VBoxManage setextradata “High Sierra” “VBoxInternal2/EfiHorizontalResolution” “1920”
$ VBoxManage setextradata “High Sierra” “VBoxInternal2/EfiVerticalResolution” “1080”
$ VBoxManage modifyvm “High Sierra” –vram 256
$ VBoxManage.exe getextradata “High Sierra” “GUI/LastCloseAction” “PowerOff”
$ VBoxManage.exe getextradata “High Sierra” “GUI/LastNormalWindowPosition” “0,132,640,480,max”
$ VBoxManage.exe getextradata “High Sierra” “GUI/ScaleFactor” “2”
$ VBoxManage.exe getextradata “High Sierra” “VBoxInternal2/EfiGraphicsResolution” “1920×1080”
$ VBoxManage.exe getextradata “High Sierra” “VBoxInternal2/EfiHorizontalResolution” “1920”
$ VBoxManage.exe getextradata “High Sierra” “VBoxInternal2/EfiVerticalResolution” “1080”
I followed the same steps but change the resolution from 1920×1080 to 1366×768 according to my HOST resolution. Now every step worked except the one with “-vram 256”.
VboxManager.exe is giving me error: “invalid option”.
Can you please help me out?
Sorry, you are on your own here
Can’ t work on Linux with VirtualBox, show me options for booting.
I did all the steps and all was fine, but in this point “And after some time you should have the new MacOS 10.13.4 High Sierra ready in you VirtualBox.” never boot. Show me options to select disk/ or access UEFI menu. no info in the partitions.
I have another VirtualBox server with 10.13.3 version, and can’ t upgrade…
May be it’ s a bug related with my hardware.
ideas ?
What ISO image did you use to install ? I have used the one in the article ( https://drive.google.com/uc?export=download&confirm=7plO&id=1NCYqmwqgbt_PahzmVmiTtYw59lpArjV7)
Yes, I downloaded it. it’s what I’m trying to install.
I have installed MacOS 10.13.4 on VirtualBox 5.2.10 (now I have 5.2.12) with no issues. Did you use the proper folder name where your MacOS virtual files are ? during the below command sequence ? In this example I have used “High Sierra”, since this is the name of my folder, yours could be different.
$ VBoxManage modifyvm “High Sierra” –cpuidset 00000001 000106e5 00100800 0098e3fd bfebfbff
$ VBoxManage setextradata “High Sierra” “VBoxInternal/Devices/efi/0/Config/DmiSystemProduct” “iMac11,3”
$ VBoxManage setextradata “High Sierra” “VBoxInternal/Devices/efi/0/Config/DmiSystemVersion” “1.0”
$ VBoxManage setextradata “High Sierra” “VBoxInternal/Devices/efi/0/Config/DmiBoardProduct” “Iloveapple”
$ VBoxManage setextradata “High Sierra” “VBoxInternal/Devices/smc/0/Config/DeviceKey” “ourhardworkbythesewordsguardedpleasedontsteal(c)AppleComputerInc”
$ VBoxManage setextradata “High Sierra” “VBoxInternal/Devices/smc/0/Config/GetKeyFromRealSMC” 1
I have just recreated the steps on a brand new Linux distro on Virtual Box 5.2.12 and it WORKS. So you must be doing something wrong … please follow the steps as they are described in the article.
I have to download another ISO (vmdk) and had work perfectly.
Anyway, Thanks,
How can I get it connected to the internet? I am using windows 10, I managed to install it and everything but it is not clear to me which script I have to run and where.. thanks in advance!
The article I have written is about how to setup the networking for VirtualBox in Linux. For Windows VirtualBox just use basic NAT network in the VirtualBox Network config menu and let choose DHCP in your MacOS network config.
Hi! I’ve tried to install HS 10.13.4, using VM 5.2.12 r122591 (Qt5.6.2), and windows 10. It looks well in the begining, but after “Now boot the VM and the MacOS installer will come up after some time”, it nevers happened. Can you help me?
Did you enter the UEFI commands as shown ? Im not sure how this works on Windows 10, the article is about running this on Linux
I just finished the installation for Windows 10. When you entered the UEFI commands, was VirtualBox closed? I believe that executing the commands when it is open will cause some trouble.
You need to remove the ISO CD from the virtual DRIVE and hard reboot .. then it will enter UEFI
The install worked well, Windows 10 host, but there’s no sound even though I enabled sound from virtualbox settings. Any fix?
Sorry .. I cannot help with Win10 .. article is about MacOS in VirtualBox in Linux
I am using the image you provided on Ubuntu 16.04 w/ VirtualBox 5.2.12.
It boots, then appears to be stuck on “Start CalculateAdler32”. Any ideas?
CAN you post screenshots ?
https://imgur.com/MBcdGQI
This is strange, you should be able to get to the MacOS boot fairly quickly. Can you try the 10.13.5 ISO that is located here ? https://astr0baby.wordpress.com/2018/06/11/installing-high-sierra-10-13-5-in-virtualbox-5-2-12-on-linux-x86_64/
What I mean on 64bit Linux the MacOS ISO should get to the MacOS boot even without any tweaking in the VirtualBox settings. So there seems to be something wrong in your environment if the ISO load gets stuck in the pre-MacOS stage (efi)
OK i should have mentioned I have an AMD processor! That’s probably the issue, right?
OK i should have mentioned I have an AMD processor! That’s probably the issue, right?
Well that could probably be it. I don’t think Apple MacOS can run on AMD CPU. I have done all my tests on Intel x86_64.
Pingback: ติดตั้ง macOS High Sierra 10.13.4 บน VirtualBox | Phaisarn Sutheebanjard
all good now my screen look like this from last 30mits… it will automatically showup or i need to close and restart the VM?
(to mention- MY INTERNET CONNECTION IS BIT SLOW 250kb/s)
sorry i am unable to upload the pic ryt now. the last line of code is “succesfully authenticated/ macOS data/Base System.dmg”
Sorry I don’t see anything
Hi and thanks for your tutorial. It works great. I have Windows 10 Pro -> Virtualbox -> High Sierra in 1920×1080. BUT, I have no sound on the Mac. Any suggestions?
Sound does not work.
Use unmodified AppleHDA.kext from High Sierra 10.13.1 and Kext Utility to install it. I Have 10.13.6 with working sound on Win 10 Host, VirtualBox 5.2.18.
Thanks, will give it a try. There seems to be a High Sierra 10.13.1 AppleHDA.kext here https://www.mediafire.com/file/1aaxh5p8zj8pxbd/AppleHDA.kext.zip
Does not work with kext utility v2.6.6 and the AppleHDA.kext .. boot gets stuck after rebooting
Just about to solve the resolution thing, this as it is we get macos with 1024*768 or something like it. So solve it with this:
VBoxManage setextradata “HighSierra” VBoxInternal2/EfiGraphicsResolution 1920×1080
Here is my vbox small virtual drive with kext and utility, compressed, just set it on second controller and it should be visible when you boot up. http://www.mediafire.com/file/i71mhsw48twe49h/VBox+AudioFix.zip
This is how it looks here: http://www.mediafire.com/view/jm264yfpgg8bjyw/Audio.jpg/file
That kext is from my first 10.13.1 install in VirtualBox where audio worked.
After you install it don’t reboot just yet, test first with “sudo kextutil /System/Library/Extensions/AppleHDA.kext”. It should return nothing as there are no problems with permissions.
I don’t know if there is any other specific thing to set as this works for me. Another pointer, I did 10.13.1 install (working sound), upgrade to 10.13.6 (no sound), fix with kext and sound was back.
Thanks for the links. Downloaded your vbox image file and tried to run the utility and load your AppleHDA.kext, ran under root the kextutil /System/Library/Extensions/AppleHDA.kext, reboot works now, but no sound device visible. What Audio Device do you emulate ? Im using PulseAudio and ICH AC97
I did a clean install of High Sierra 10.13.6 .. and the method does not work unfortunately. (Tried Intel HD Audio emulation in VBox now) Thanks for the help anyway. Appreciate it !
I emulate Intel HD Audio.
No luck. I believe its maybe because I have installed a vanilla 10.13.6 in the first place ? (no upgrades from previous versions)
I will try with vanilla 10.13.6 install and check if I can spot what’s different.
Ok, I got it. Since those kexts are protected by SIP you need to turn it off first using apple recovery boot. Disable SIP, reboot to normal OS and install AppleHDA.kext with Kext Utility. You can also clear kext cache with before another reboot (do “sudo kextunload /System/Library/Extensions/AppleHDA.kext” and “sudo kextcache -i /”.Reboot and check if it’s working. Reenable SIP after everything is up and running.
Thanks for the feedback ! There were some people that were asking me about this (I don’t really need audio for VB VMs) so hopefully they will find this info helpful.
I can confirm that MrQuickFX Audio_Fix is working on clean install of 10.13.6.
You have to reboot to recover, do ‘csr disable’, reboot back to HS and replace AudioHDA.kext with old one. Than reboot and it works.
Perfetct ! :)
… reboot to recovery partition …
… csrutil disable …
# this disables SIP — Google it! , you can see the status by ‘csrutil status’
Now I did everything here on Windows 7, but when I start the Vbox, it stucks at primary loading, and I cant do anything afterwards. I have attached a screenshot would you please help me here?
Its frustrating really.
https://ibb.co/cDTQmV
cheers
This is a Linux guide on how to run it… if you are on AMD then it won’t work for you. Please refer to some Windows guides, they can help more probably.
On my Ubuntu 18 VirtualBox I got an error when starting the virtual machine, after setting the extradata for EFI from the command line:
Invalid config value(s) for the EFI device (VERR_PDM_DEVINS_UNKNOWN_CFG_VALUES).
The fix was to add my user to vboxusers group, as it looks like I am not a group member by default
Thank you so much for this guide! The only one I’ve found that describes all the necessary steps without relying on people downloading some prebuilt virtual drive.
Glad it was useful :) Thx for commenting.
Thanks for guide!
I try to install Mojave and I have problem after last step. After VM auto-reboot, I have only EFI shell.
https://ibb.co/nR4QV8R
right link https://ibb.co/p1WLcNM
Please follow the latest method mentioned here https://astr0baby.wordpress.com/2018/09/25/running-macos-mojave-10-14-on-virtualbox-5-2-18-on-linux-x86_64/
Hi what a super guide!
I just installed on a dell latitude e5450 and works like a charm.
Except audio…
First time i did this with a osx and was realy proud to get it working.
But i hope that someone can help me to get my audio fixed..?!
Audio does not work, it requires some minor adjustment and one legacy kext loading. You can read MrQuickFX’s solution here https://astr0baby.wordpress.com/2018/07/15/installing-high-sierra-10-13-6-in-virtualbox-5-2-12-on-linux-x86_64/ – search for “Update from MrQuickFX to get Audio going in VIrtualBox macOS guest”
Hi,
just tried to follow this guide.
Downloaded the zip and tried to use the vbox adiofix.vmdk file in a new created virtual machine.
i did that just the same as i followed the guide for high sierra.
this wont start up and gives me some text ending with shell:
am i not using the vmdk file correct?
You are on your own there. I did not test this, but some users reported that it worked on High Sierra. I do not need sound on the Virtualized macos.